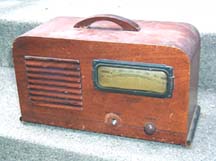
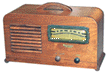
 I picked up this 1938 Firestone at a local antique mall for $15. I really like
Firestone radios - they are just about my favorite brand. I've got quite a few
of the models, but many of them need work. This looked like an easy restoration.
All it really needed was to be refinished. The lacquer was flaking off in places,
especially around the knobs. The brown trim on the lower sides was in poor shape and
flaking off. There was a knob missing, but it was a common style
which are not hard to find. The dial cover was yellowed and scratched.
I picked up this 1938 Firestone at a local antique mall for $15. I really like
Firestone radios - they are just about my favorite brand. I've got quite a few
of the models, but many of them need work. This looked like an easy restoration.
All it really needed was to be refinished. The lacquer was flaking off in places,
especially around the knobs. The brown trim on the lower sides was in poor shape and
flaking off. There was a knob missing, but it was a common style
which are not hard to find. The dial cover was yellowed and scratched.
Electronically, the cord was cut on the radio so I was
unable to power it up.
|
|
After stripping
|
Cabinet Restoration
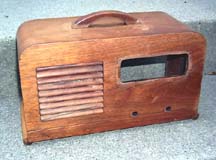
The lacquer finish on this radio was quite bad. The only choice for this radio was to completely
strip off the old finish and apply a new lacquer finish. I removed the finish
with steel wool and Park's Refinisher. It took about 30 minutes to get all
the finish off, and I ended up using a toothbrush to get into the detail
areas on the front grille. The case looked pretty good after stripping, as you
can see on the right.
|
|
Applying Decals
|
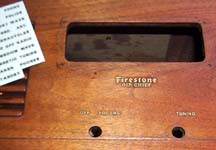
The edges on the sides are rounded pieces of wood that were done in a dark brown
trim. I carefully taped off these sections and painted them with brown spray paint.
The paint wasn't quite as dark as I would have liked, but it still looks pretty close.
I then stained the radio with Minwax Early American, then applied several light coats
of clear lacquer. At this point, I applied the decals. This radio had a Firestone
decal, as well as decals above the knobs. I carefully applied decals which were
purchased from Rock Sea Enterprises, making sure that they were straight and aligned
in the proper position. Take a photo of the radio before stripping to make sure you
get the decals right!
|
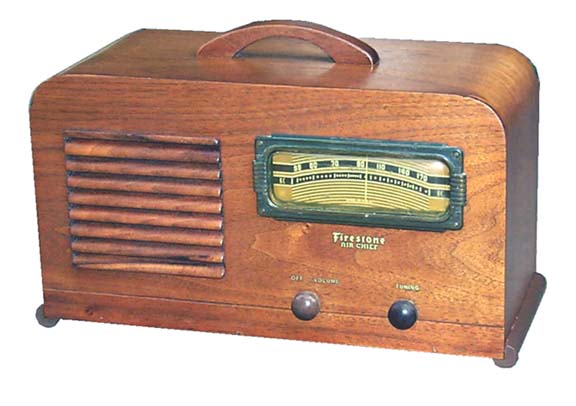
It's done!
Click for a larger picture...
|
Once the decals had dried, I applied multiple coats of clear lacquer to finish
the radio. Once the lacquer had been applied, I let the radio sit for a week,
then carefully sanded out the lacquer finish using 600 and 1500 grit paper with
lemon oil. The finished radio is shown on the right - it turned out quite well! I
still need to find an exact knob replacement. The one I had on hand is a tad
bit darker than the other.
Electronic Restoration
I'll probably take a look at the chassis this winter - for now, I'm concentrating
on getting cabinets done.