|
|
|
|
Postwar Bakelite Radios: Coronado 43-8180 Restoration
|
| |
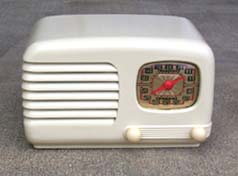
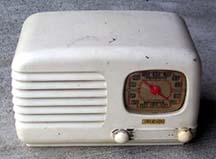 I picked up this Coronado for $15 at a junk shop. I love this style, and I have another
just like it, except with a handle. This one has a chip out of the back of the case, so
it
will need some work. It has the loud hum typical of a set with blown filter capacitors.
The paint is in pretty poor shape, with lots of chips and dings.
I picked up this Coronado for $15 at a junk shop. I love this style, and I have another
just like it, except with a handle. This one has a chip out of the back of the case, so
it
will need some work. It has the loud hum typical of a set with blown filter capacitors.
The paint is in pretty poor shape, with lots of chips and dings.
Cabinet Restoration
|
|
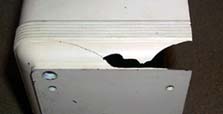
Damage to side of the case
|
As you can see from the photo to the right, the case has a large chip and crack out of
it. Fortunately, part of the chip was intact, rattling around in the case. I took
that piece of bakelite, and glued it back in place using a 60-second epoxy. I also
glued the crack on the left from behind to stabilize it. I then glued a small piece
of plastic behind the cracked and chipped area to help stabilize it. This would
also give the bondo repair an area to adhere to.
|
|
Bondo Patch
|
The next step was to fix the rest of the chip that was missing. I layed on a
coat of bondo, filling up the chipped area. The bondo sets quickly and can be
"knocked down" to the appropriate size before it is completely hard. Then,
once it has set, you sand it down using progressively finer grades of paper.
The patched area is shown on the left. Once the bondo is done, I like to prime
the whole radio with gray primer to make sure it looks right. Before doing that,
I carefully sanded down all the areas that had chipped. Unfortunately, this meant
destroying the decal on the front of the radio. Once the chips were sanded down,
I put on a coat of gray primer. The primer showed me that the patched area
wasn't quite perfect, so I did some touch-ups using glazing putty. I then primed
that area again, repeating these steps until the patch looked perfect.
|
|
Painting With Antique White
|
After the primer was set, I painted the radio with Krylon's Antique White. I layed
on many heavy coats, but did have a few areas that needed touching up. The photo
on the right shows the front of the case while still wet. After all the case
was painted and dry, I lightly sanded it down with a very fine sandpaper. Then,
I applied several coats of high gloss clear lacquer to seal the paint and smooth
out the surface a bit. The lacquer was rubbed out with #0000 steel wool. The
overall look is fantastic!
|
|
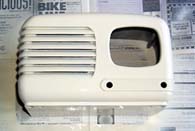
The Finished Radio
|
The completed cabinet is shown on the left. The shot isn't that great, but you
can see that the radio turned out great! After cleaning up the dial glass and
the foil dial, the radio was done, at least from a cosmetic perspective. Of course,
I'm lacking the original decal, unfortunately. I'm not aware of any source
for that sort of decal. I've seen these radios both ways (with and without the decal),
and also from different manufacturers. I'll just have to live without the decal.
|
|
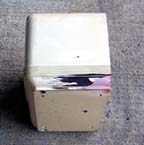
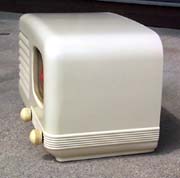
The Fixed Area
|
On the right side, you can see a shot of the radio from the side, where the
damaged area was. This patch turned out pretty well. It's taken 3-4 projects
like these to really get good at it, and this one is about 99% perfect (I think you
can always see a patch, if you know it is there).
Electronic Restoration
Once the radio was re-capped, the hum went away and it worked great! This was a
pretty easy project, overall. From a $15 junker to a great looking piece of
radio history. Another busted-up radio saved from a landfill!
|
|


